Simple DIY Picture Frame for Mermaid Tail Fabric
If yous have a item piece to frame, and that slice happens to be large or oddly shaped, yous know how frustrating and/or expensive it can be to frame information technology. That's where being able to build your own picture frame comes in handy. With a DIY picture frame, you tin can hands create information technology to your size and style specifications. This tutorial illustrates how to brand a very basic DIY picture frame in nether an hour (plus drying fourth dimension for any stain or paint you choose) and tin be used to frame a 3D object – specifically, sensory "mermaid tail" fabric that is quite trendy correct now. Visitors young and old will love this. Hither's how.
 View in gallery
  View in gallery
 Using 1×2 lumber lengths, cut two sets of identical frame sides with 45-degree corners. If you are mounting a 3D slice, such equally mermaid tail to your frame, your final frame size should exist 1"-ii" larger than your mounting piece. For example, a xx"x30" mermaid tail piece volition require a frame that measures 21"-22" past 31"-32" on the exterior.
 View in gallery
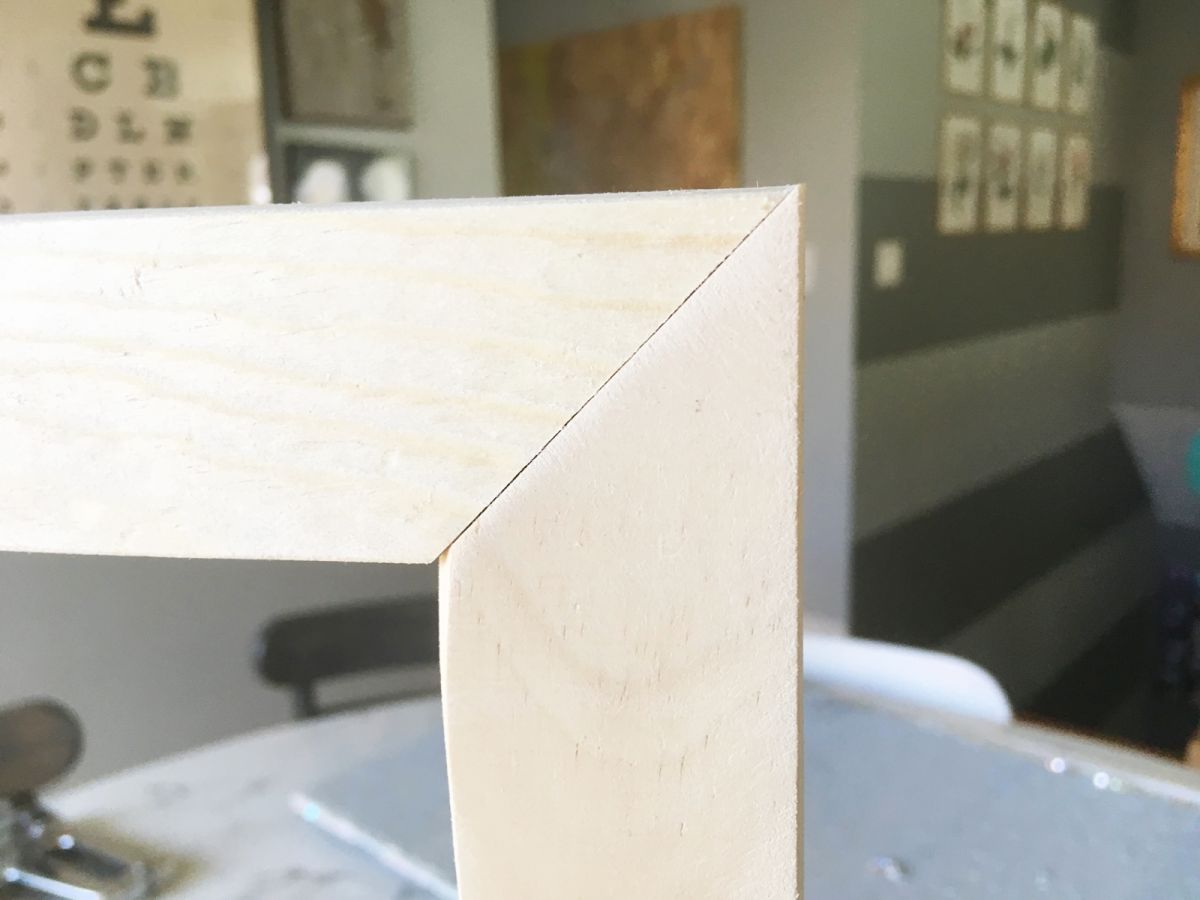
 Be sure to measure your final frame lengths from the outside betoken of your 45-degree corners.
 View in gallery
 Lightly sand all frame pieces using 120- or 220-grit sandpaper. Do not sand the mitered corners.
 View in gallery
 Using a square as your guide, clench together one of each set of your frame lengths in a perfect 90-caste joint.
 View in gallery
 Use a brad nailer to join the two frame lengths together. I nailed in 2 or three nails on each side of every corner.
 View in gallery
 Adore your 90-caste corner for a second, then repeat the square clamping and nailing on the three other corners.
 View in gallery
 Here is your perfectly square-cornered frame. It'southward continued, but it's not particularly secure yet.
 View in gallery
 Lay your completed frame, front side down, on a clean and flat surface. Utilize a heavy-duty stapler to secure the corners together on the dorsum side, about iii staples per corner should do the flim-flam.
 View in gallery
 When the frame is secured with corner staples, information technology'south time to finish it. Stain or paint it every bit you want. This example uses a Krylon clear glaze. Let dry completely.
 View in gallery
 While your frame stop is drying, information technology's time to go your mermaid tail fabric or other 3D frame-able piece ready. For the fabric: lay your mermaid tail fabric face up-down on a apartment surface.
 View in gallery
 Identify a slice of foam board sized to your frame'southward specifications on pinnacle of the fabric with an inch or two of textile overhang on all sides. This example uses a standard xx"x30" foam lath, sold at any craft store. (Note: For fifty-fifty meliorate results, spray the fabric-touching side of the cream board with adhesive spray before laying it on the fabric.)
 View in gallery
 Pulling the mermaid tail material taut every bit you go, wrap and tape the edges onto the back of your cream board with duct tape. Be sure in that location are no wrinkles in your cloth.
 View in gallery
 You lot will end up with a lovely, flat mermaid tail fabric piece, mounted deeply onto your foam lath. This is now gear up to be framed.
 View in gallery
 Once the frame is completely dry, use your stapler to adhere the mermaid tail fabric to the back of the frame. Information technology should exist centered so there is a ½" to 1" space between the fabric and the outside edge of your frame. Staple all the fashion around the foam board to attach it to the frame deeply.
 View in gallery
 Attach mounting hardware to the dorsum of the frame and hang it upwardly.
 View in gallery
 This is a fun and even therapeutic sensory resource. Swipe the fabric 1 mode for one colour, swipe opposite for another.
 View in gallery
 The frame provides a perfect support and structure, not to mention manner, to this fabric.
 View in gallery
 With a contemporary DIY picture frame, you lot tin even add together something youthful similar mermaid tail sequins to a gallery wall. Simply brand sure to mount information technology at a height that'southward advisable for its intended audience (namely: kids or seated adults). Have fun! Enjoy!
Source: https://www.homedit.com/mermaid-tail-fabric-picture-frame/
0 Response to "Simple DIY Picture Frame for Mermaid Tail Fabric"
Postar um comentário